AIR NEO MANUAL PLAIN TEXTUpdated 2 years ago
Congratulations!
Welcome to a new era in capturing personal moments.
Congratulations on choosing a better way to take selfie photos and video with your new AIR NEO from AirSelfie. This manual will help you get the most out of your AirSelfie experience. We recommend that you read through it in its entirety before taking your AIR NEO on its first flight.
This English manual is available for download on our website SUPPORT
section at: www.airselfiecamera/airneoum. Support for additional languages is coming soon. You will also find answers to most of your questions about your new AIR NEO on the SUPPORT
page on the website or contact us at: [email protected]
Index
Component Overview
AirSelfie App
Charging & Data Transfer
Powering Up
Pairing AIR NEO & Smartphone
Firmware Upgrade
Calibration
App User Interface
Flying Your AIR NEO
Flight Modes
AutoFly Mode
Phone-Free AutoFly Modes
Manual Flight Mode - Gyro Control
Manual Flight Mode - RC Joystick Control
Safety Notice
Component Overview
AirSelfie App
The universal AirSelfie App features “One-Touch” intuitive simplicity. iOS users can find it on the App Store and Android users can download it from Google Play for free.
App Store:

Google Play:

Charging
Your AIR NEO comes with a partial charge, so you are good to fly right out of
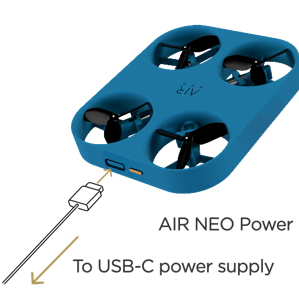
the box. The average flight time of a full charge is 6 minutes. It’s easy to recharge NEO’s battery using the USB-C cable that came with your AIR NEO. If you purchased the AIR NEO Power Bank, simply slide your AIR NEO into it until you see the red Battery Indicator Light turn on. When the light turns off your AIR NEO has been fully charged.
Turn off the device and plug the USB-C cable into the port on the side of the device next to the Power button.
The red Battery Indicator Light will turn on.
When the battery is fully charged the red light will turn off.
Powering Up
To turn your AIR NEO on press and hold the Power Button on the side of the device next to the USB port down for a second or two. 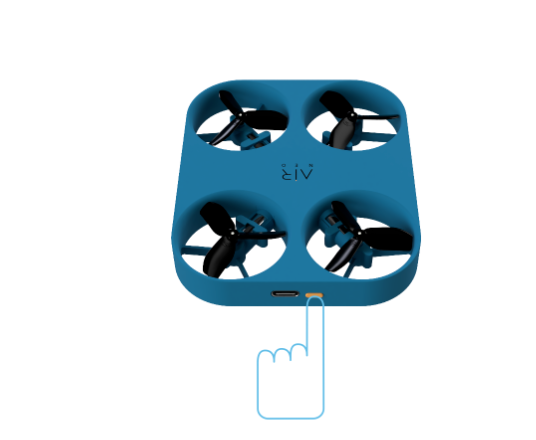
The blue Function Indicator Light will flash rapidly when your AIR NEO is powered up.
Pairing AIR NEO & Smartphone
Your AIR NEO connects to your smartphone through a 2.4GHz wi-fi connection.
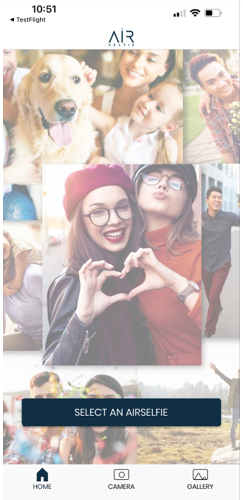
Step 1:
Press SELECT AN AIRSELFIE
Step 2:
Select AIR NEO from the menu
Step 3:
Press CONNECT
Step 4:
Press OPEN SETTINGS
Step 5:
In the Settings app select Wi-Fi
Step 6:
Select Airneo-XXXX (each AIR NEO has its own ID)
Step 7:
Check wi-fi has been connected
When completed, return to the AirSelfie app.
The rapidly flashing blue Function Indicator Light will now be glowing solid blue.
(Note: iPhone iOS screens shown)
Firmware Update
After completing the Set-Up process to connect your smartphone to your AIR NEO you may see the screen below informing you that a firmware update is needed. Firmware Updates are an easy two step process.
Step 1
Simply press the UPDATE FIRMWARE button on the bottom of the screen.
Step 2
After a few minutes you will see the screen to the right. Press the DONE button and restart your AIR NEO.
Step 3
Relaunch the AirSelfie app. From the camera screen you will be asked to SELECT AN AIRSELFIE. Go through the AIR NEO to smartphone pairing process as before.
Calibration
It is important that you calibrate your AIR NEO the first time you connect to your smartphone, and when operating at a different location.
Step 1:
Press Calibrate
Step 2:
With the device on a flat, level surface - press Calibrate
Step 3:
When Calibration completes successfully, press Done
App User Interface
The AirSelfie app has 3 main areas that can be accessed by pressing
the icons on the bottom of the screen. Use the “Home”, “Camera”, and “Gallery” buttons to navigate between these main interaction areas. You may easily return to the previous screen by selecting the “back arrow” at the top-left corner of the screen at any time.
Home Screen
Camera Screen
Gallery Screen
Flying Your AIR NEO
Indoor Flight Recommendations:
It is highly recommended that you take your first AIR NEO flight indoors.
Your AIR NEO uses visual positioning technology for optimal-optical hovering performance. For maximum stability, it is advised to fly the device over flat and multi-colored surfaces.
Ensure there is sufficient lighting whenever using the device indoors.
Outdoor Flight Recommendations:
Do not operate in bad weather conditions (rain, snow, wind, etc.).
Do not fly over crowded areas or motor traffic.
Fly AIR NEO in plain sight and away from obstruction or water.
Your AIR NEO has a maximum flight range of 60’ (18.2m).
Flight Modes
There are many ways to fly your AIR NEO... with or without your smartphone! In the AirSelfie app go to the Camera screen and scroll left or right along the bottom to line up the mode you would like to fly in with the blue arrow.
AutoFly Modes: At the touch of a button AIR NEO launches, flies a few feet away and finds you, takes a selfie or video and comes back to you all on its own. You can select the number of pictures AIR NEO will take when in photo mode.
Orbit Mode: AIR NEO will launch and automatically find you - then capture a video as it flies in a 8’ (2.5m) circle around you.
360 Mode: Want to capture an awesome 360° video of the world around you? Use this mode to launch AIR NEO automatically. AIR NEO will rotate in place, capturing a short video.
You can also fly without being connected to your smartphone:
Phone-Free AutoFly Modes: Fly like never before. Using the Mode Button, select between AutoFly Zoom, AutoFly Wide, AutoFly Video, and AutoFly Orbit modes!
Manual Mode - Dual Joystick Control: Operate your AIR NEO just like a traditional RC drone using on-screen joysticks in landscape mode.
Manual Mode - Gyro Control: Pilot using the gyroscope in your phone and simple swipes of the app joystick
AutoFly Mode (using your phone)
Your AIR NEO can take photos and videos of you while you stay completely immersed in your activities in the AutoFly mode. Just follow these simple steps:
Scroll and select the “AUTO-FLY” mode
Select either fast or slow performance mode from the toggle switch. It is recommended to select the rabbit (fast) mode when flying outdoors in wind.
Choose whether you would like to take continuous video or photos.
If you select photos you can choose how many selfies you want to take by pressing the Shot Count button. You will get the choice of shooting 2, 3 or 5 shots. After you pick how many shots you want.
With the power on, place the AIR NEO on your open palm keeping it flat and parallel to the ground with the logo up and the camera pointing at your face.
AIR NEO is ready to fly when the “Pause” symbol in the gold circle in the middle of the screen changes to a “Play” arrow.
Press the “Play” arrow and the propellers will start to slowly spin.
8. Gently toss the device in front of you as shown and AIR NEO will take flight automatically.
Tip: A gentle toss is all that is needed to launch AIR NEO. Too little or too much force may result in abnormal flight.
9. Your AIR NEO will then fly a few feet in front of you taking either continuous video or the number of selfie photos you selected.
10. In Video Mode the blue Function Indicator will remain illuminated while the charging light will turn red when a face has been detected and recording begins. The red light will disappear when recording has stopped.
11. In Photo Mode the blue Function Indicator will remain illuminated while the charging light will blink quickly red three times when a face has been detected and the capture countdown has begun. Then the red light will slowly blink with each photo that is being taken. The red light will disappear when photo capture has stopped.
13. After AIR NEO has taken either video or the number of photos you selected it will begin to fly back towards you.
14. Raise your hand to chest level to allow AIR NEO to land in your palm. Note that when outdoors or in dimly lit areas, AIR NEO may need you to reach out a little for a safe landing.
Tip: If AIR NEO cannot find a face to lock into it will automatically softly land. If this happens please recalibrate before your next flight (see Calibration section).
Phone-Free AutoFly Modes
Launch, fly and take stunning HD Selfies & Video without even being connected to your smartphone. Capturing great moments has never been easier - here’s how:
Turn on AIR NEO by pressing the power button for more than 2 seconds.
When the blue light begins to blink rapidly, quickly click the power button several times - corresponding to the table on the right to select which AutoFly Mode you wish to automatically fly.
3. Just like in the AutoFly mode, place the AIR NEO on your open palm keeping it flat and parallel to the ground with the logo up and the camera pointing at your face. Gently toss the device in front of you as shown, and AIR NEO will take flight automatically.
Tip: A gentle toss is all that is needed to launch AIR NEO. Too little or too much force may result in abnormal flight.
Manual Mode - Gyro Control
In addition to AutoFly and app-free flight, AIR NEO may also be flown manually through the Control-Camera screen.
Launching in Manual Mode - Gyro Control
Hold AIR NEO (camera facing towards you) in your hand, at arm’s length, with your phone held horizontally flat in your other hand. This is important because your phone’s motion sensors are in control of flight direction.
Set the performance slider to match your flight conditions. Note that this screen is currently indicating that the device is in Outdoor mode, with performance set high so that AIR NEO is prepared to handle windy conditions.
Tip: AIR NEO will use battery life faster in this setting as the motors will be working harder.
When you see yourself in the Viewfinder Window on the top of the Camera screen, simply press the blue Launch Button on the lower right side of the Viewfinder Window and your AIR NEO will take flight.
Tip: Use the Arrow Down button to the left of the Launch Button to land AIR NEO.
PILOTING IN MANUAL MODE
DIRECTION:
AIR NEO uses the gyroscope in your phone to control AIR NEO in flight. Keep your thumb on the joystick to activate control and tilt your phone in any given direction you want AIR NEO to fly:
Dip down for camera forward flight
Tip up for backward flight
Tilt left to go camera left
Tilt right to go camera right
Tip: Use the Control Reversal button to change camera orientation from Selfie to Perspective controlled flight.
ELEVATION: Slowly move your thumb on the Joystick either up or down to make AIR NEO fly either up or down.
ROTATION: Slowly move your thumb on the Joystick to the right to direct AIR NEO to rotate clockwise. Similarly, move your thumb left to make AIR NEO rotate counter-clockwise.
Tip: To stabilize a seemingly out of control flight take your finger or thumb completely off the Joystick. AIR NEO will then go back to a steady hover. Be sure to move your thumb and steady, as swiping too fast may result in erratic flight.
TAKING PHOTOS & VIDEO IN MANUAL MODE
Beneath the Joystick there is a thin blue circle with the Photo/Video switch on the right side. Press the button to toggle between Photos capture and Video recording.
In Photo mode the circle is filled with a gray trigger button. Press the trigger to take a picture. In Video mode there is a red trigger in the circle. Press the trigger to start a video and again to stop recording.
Manual Mode - RC Joystick Control
AIR NEO may also be controlled like a traditional RC aircraft for those that want a more videogame type of experience. Use the Phone Orientation button to change from Gyro to Landscape RC layouts.
Note: Landscape RC control does not use your phone’s gyroscope to fly. You may still select Selfie or Perspective controlled flight in this view.
Safety Notice
An Auto-Safe Landing function automatically lands AIR NEO gently and safely if the device is low on battery or in case of loss of control.
QUICK STOP
To manually and instantly turn AIR NEO off in mid-flight simply grab the device with your hand (be careful to avoid the propellers) and flip it upside down. AIR NEO will automatically shut off and the propellers will immediately stop rotating.